Drawing mold diagram
Before drawing the general assembly diagram of the mold, the process diagram should be drawn, and it should meet the requirements of the part drawing and process information.
The dimensions guaranteed by the next injection molding cycle process should be marked on the drawing with the words “process dimensions”.
If there is no mechanical processing after molding except for burr repair, the process diagram is identical to the part drawing.
The part number, name, thermoplastic material, material shrinkage rate, and drawing ratio should be indicated below the process drawing. Usually, the process drawing is drawn on the general assembly drawing of the mold.
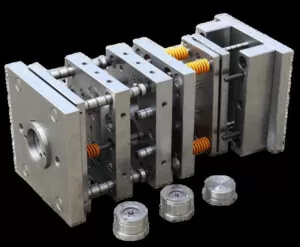
Try to use a 1:1 scale to draw the general assembly drawing, start from the injection mold cavity first, and draw the main view and other views at the same time.

(1) The general assembly drawing of the mold should include the following:
1. The structure of the molding part of the mold.
2. Structure form of pouring system and exhaust system.
3. The parting surface and the way of taking parts from the mold.
4. Shape structure and the position of all connecting parts, positioning, and guiding parts.
5. The height of the marked cavity size (not forced, as needed) and the overall dimensions of the mold.
6. Auxiliary tools (picking and unloading, alignment, etc.).
7. Serialize all parts in order and fill in the detailed table.
8. Mark the technical requirements and instructions for use.
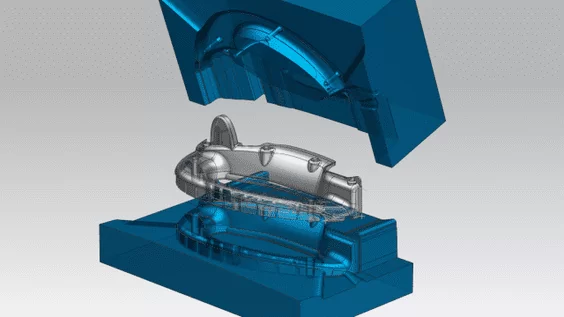
(2) The technical requirements of the general assembly drawing of the mold content
For the performance requirements of certain systems of the injection mold. For example, the assembly requirements for the ejector system and slider core extraction structure.
Requirements for the mold assembly plastic injection molding process. For example, the fitting gap of the fitting surface of the parting surface after mold assembly should be no more than 0.05mm.
The parallelism requirements of the upper and lower part of the mold, and point out the size decided by the assembly and the requirements of the size.
Mold use, assembly, and disassembly method. Anti-oxidation treatment, mold numbering, lettering, marking, oil seal, storage, and other requirements.
Requirements concerning mold testing and inspection. The order of drawing parts from the general assembly of the injection mold should be as follows: first inside, then outside, first complex, then simple, first molding parts, then structural parts.
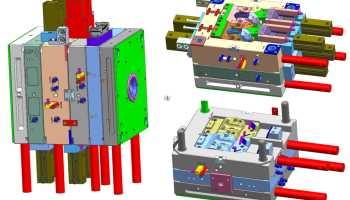
(3) Graphic requirements
Must be drawn to scale, allowing enlargement or reduction. The view selection is reasonable, the projection is correct, and the arrangement is appropriate.
To make the processing patent number easy to read and easy to assemble, the graphics are consistent with the general assembly drawing as far as possible, and the graphics should be clear. Marking dimensions require uniformity, concentration, order, and completeness.
The order of marking dimensions is first to mark the size of the main part and out of the injection mold slope, then mark with the size, and then mark all dimensions. The non-major parts of the diagram are first marked with the size, then marked with all the dimensions.
(4) Surface roughness
The application of the most roughness is marked in the upper right corner of the drawing, such as marked “the rest of 3.2.” Other roughness symbols in the parts of each surface are marked.
(5) Other content
For example, the name of the part, injection mold drawing number, material grade, heat treatment, hardness requirements, surface treatment, graphic ratio, free-size machining accuracy, technical instructions, etc. should be filled out correctly.

Proofreading, reviewing drawings
The relationship between the mold and its parts and the drawing of plastic parts. Whether the material, hardness, dimensional accuracy, structure, etc. of the mold and injection molded parts meet the requirements of the plastic parts drawings.
(1) Plastic parts
Whether the flow of molten plastic material flow, shrinkage, fusion marks, cracks, mold slope, etc. affects the performance, dimensional accuracy, surface quality, and other requirements of the plastic parts.
The pattern injection mold design has no shortcomings, the processing is simple, and the shrinkage rate of the molding material is selected correctly.
(2) Molding equipment
The injection volume, injection pressure, and clamping force are enough, the installation of the mold, the southern core of the plastic parts, and the mold release have no problems, and the injection molding machine nozzle and the querulous sleeve are correctly contacted.
(3) Mold structure
Whether the position of the parting surface and finishing accuracy meet the needs, whether overflow will occur, and whether the plastic parts can be guaranteed to stay on the side of the injection mold with the ejector device after opening the mold.
Whether the mode of mold release is correct, whether the size, position, and several promotion rods and push tubes are suitable, whether the push plate will be stuck by the core, and whether it will cause abrasion to the injection molded parts.
Mold temperature adjustment aspect. The power and quantity of the heater; whether the location, size, and quantity of the flow line of the cooling medium are suitable.
The method of dealing with the side concave of the melted plastic part making, whether the mechanism of removing the side concave is appropriate, for example, whether the slider and push rod in the inclined column core extraction mechanism interfere with each other. The location of the pouring and exhaust system, whether the size is appropriate.

(4) Design drawings
Assembly drawings on each mold parts placement parts are appropriate, whether the representation is clear, there is no omission.
Part number, name, number of parts, parts made or purchased, standard parts or non-standard parts, parts with processing accuracy, injection molding plastic parts with high-precision size correction processing and allowance, mold parts of the material, heat treatment, surface treatment, surface finishing degree is marked, clear description.
Parts of the main parts, injection molding parts working dimensions, and fit dimensions. Size figures should be correct, do not make the producer convert.
Check the view position of all parts and assembly diagrams, whether the projection is correct, and whether the drawing method is in line with the national standard of cartography, there is no omission of dimensions.
(5) Check the processing performance
All parts of the geometric structure, view drawing, size scale and so on it is conducive to processing. Recalculate the main working dimensions of auxiliary tools.
Professional proofreading in principle according to the designer’s self-calibration project; but focus on structural principles, process performance, and operational safety aspects.
When the graph is digested, the graph is depicted according to the national standard, and all dimensions and technical requirements are filled in. After the drawing, self-calibrate, and sign.
The tracing of the base map to the designer to proofread and sign, the customary practice is to be reviewed by the relevant technical personnel of the tool manufacturing injection unit, countersign, check the manufacturing mass production process, and then can be sent to the sun.
(6) Preparation of manufacturing process card
The tool manufacturing unit technical personnel prepare the manufacturing process card and are ready for processing and manufacturing.
In the manufacturing process of injection molded parts to strengthen the inspection, the focus of the inspection is on dimensional accuracy.
After the mold making is assembled, the inspector will inspect it according to the mold inspection table, the main thing is to check whether the performance of the mold parts is good or not, only in this way can the injection molding process manufacturing quality of the mold be guaranteed.

Mold test and mold repair
Although it is in the selection of molding materials, molding equipment, and mold design under the expected process conditions, people’s understanding is often imperfect, so must be completed in the mold processing, and mold trial test, to see how the quality of injection molded parts. After finding always, carry out the mold repair to exclude the error nature.
There are many kinds of defective plastic parts, and the reasons are also very complicated, there are reasons in the mold, and there are also reasons in the process conditions, and the two are often intertwined together.
Before repairing the mold, we should analyze and study the defect in detail according to the actual situation of the molded part, find out the cause of the defect and propose remedial methods.
Because the injection molding conditions are easy to change, so the general practice is to change the molding conditions first, when changing the molding conditions can not solve the problem, then consider repairing the mold.
Repair the mold should be more cautious, not very sure not to take rash action. The reason is that once the mold conditions are changed, it is not possible to make a major transformation and restore the original state. The performance of the parts is good, only then can slang language mold manufacturing quality.

Organize information for archiving
After the test, if the mold is not used for a while, it should be completely wiped off the mold dross, dust, oil, etc., coated with butter or other anti-rust oil or anti-rust agent, off and to the storage place for safekeeping.
From the beginning of the design of the injection mold to the successful processing of the mold, inspection, the technical data generated during this period, such as the mission statement, parts drawing, technical specifications, mold assembly drawings, injection mold parts drawings, base drawings, mold design instructions, inspection record sheets, mold repair records, etc.
According to the provisions of the system to organize, binding, numbering for archiving. This seems to be very troublesome, but it is useful for repairing molds and designing new molds in the future.

